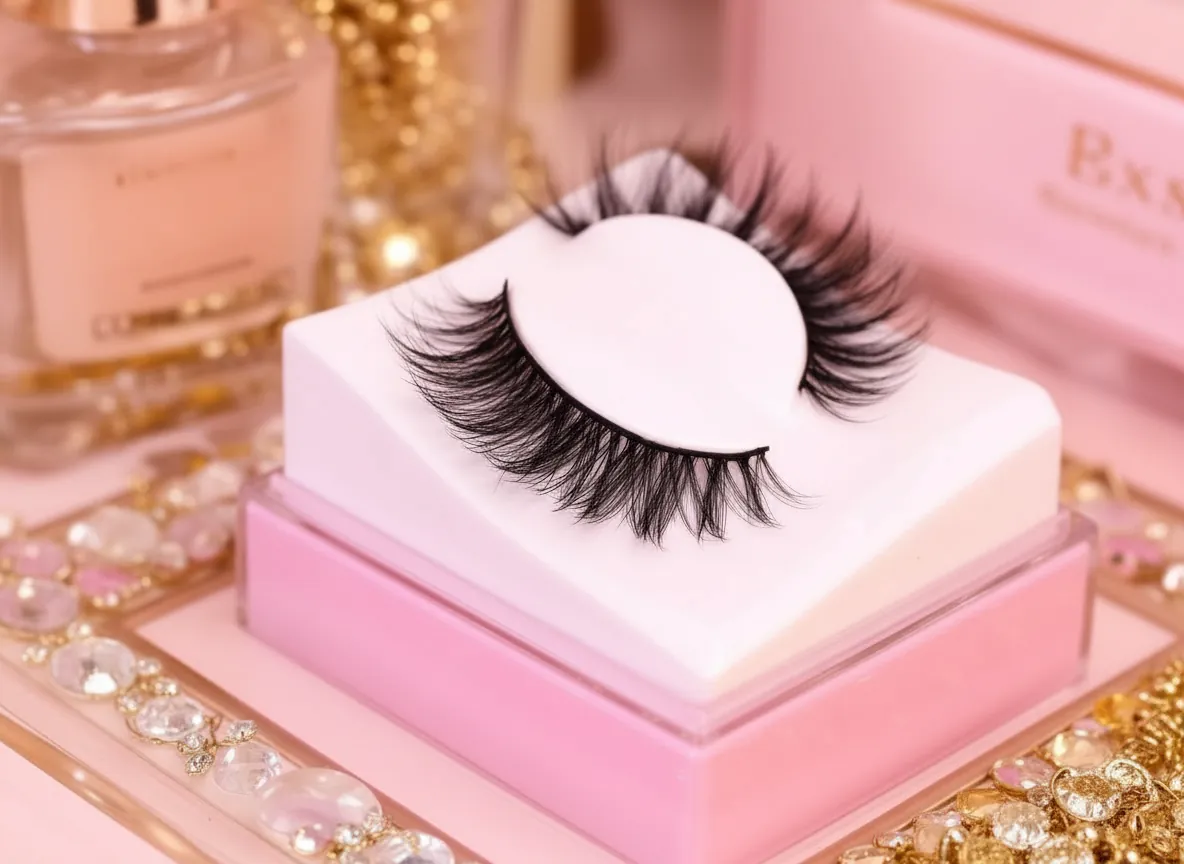
Classic lash extensions place one extension on each natural lash, which reads as mascara-like definition. Volume lashes use handmade fans of ultra-fine extensions for soft, dimensional fullness. Hybrid sits between the two, blending both for texture that looks natural and still gets noticed. Which one suits you comes down to your natural lashes, your eye shape, and how much presence you want on an ordinary Tuesday. That is why every set at Aloha Beauty Lounge in South Jordan starts with a mapping consultation.
Classic Lash Extensions: Definition Without Drama
Classic lashes follow a one-to-one method. A single extension, isolated with care, goes onto a single natural lash. The result reads like your own lashes on their very best day: length, clean symmetry, and nothing that looks stuck on.
Classics suit clients whose natural lashes are already dense, and they are the easiest first set to live with. They also suit anyone who wants a polished look that never announces itself, the kind of set a colleague reads as you having slept well rather than as you having had something done to your face. Hoping to retire your mascara rather than reinvent your eyes? Start here.
Hybrid Lashes: The Balance Most Clients Love
Hybrid lashes mix classic one-to-one extensions with lightweight volume fans, in a ratio your artist tailors to your eyes. The blend creates gentle texture: wispy, feathered, with more depth than classics and more softness than a full volume set. Uneven on purpose. That is what keeps it from looking applied.
It is the set we recommend most often to clients across South Jordan and Daybreak, who tend to arrive saying some version of the same sentence: "I want more, but I still want it to look like me." Hybrids do that.
The fullest set is rarely the right one. The right one is whatever your natural lashes can carry comfortably, cycle after cycle.
Volume Lashes: Soft, Full, and Surprisingly Lightweight
Volume lashes are built from fans of two to six ultra-fine extensions. Each fan is formed by hand, then set on a single natural lash. Because the individual extensions are so fine, a full volume set can weigh less than a heavy classic set. The fullness is a matter of how the fan opens across the lash line.
Healed microblading photos make the process look deceptively simple. Full, symmetrical brows that look like they were always there. What those photos leave out is everything that happens before the first stroke of pigment: measuring, mapping, checking symmetry from more than one angle, and a consultation that screens for anything the skin cannot safely carry. Still deciding whether microblading is even the right technique for your skin? Our microblading vs powder brows guide is worth reading first. This article picks up from the point where microblading is already the plan.
Step One: Consultation and Health Screening
Every appointment opens with a conversation. No tools come out yet. Your artist reviews your skin type, your natural brow growth, any previous brow tattooing or microblading, and any conditions or medications that might affect healing or how pigment holds. Certain skin conditions, blood thinners, and recent sun or chemical exposure around the brow area all factor into that screening. It is also the moment to take a photo of your natural, unworked brows, because that photo becomes the baseline every later decision gets measured against.
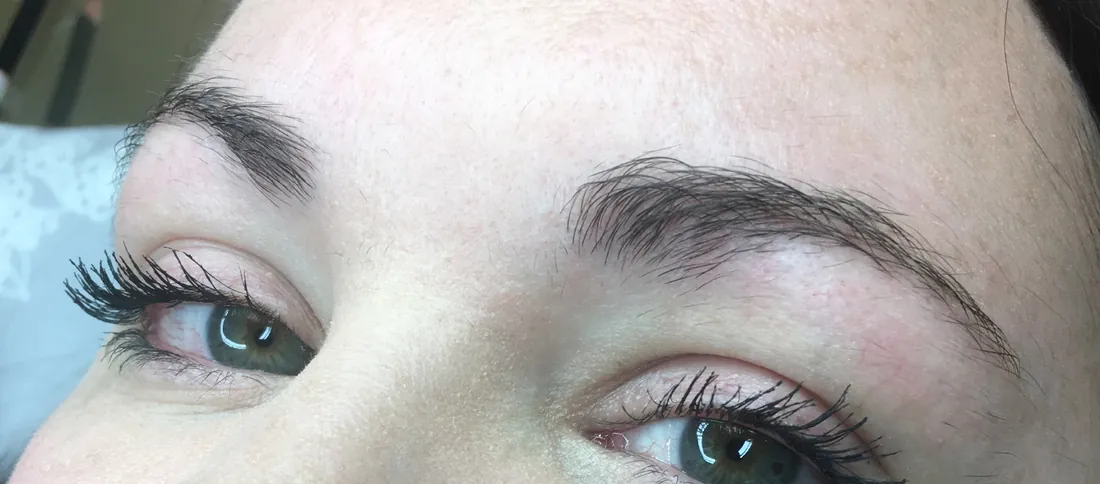
A short consultation like this also confirms you are ready for the appointment that day, and gives your artist a clear look at how your natural brow hair grows before anything gets mapped over it.
Step Two: Brow Mapping and Measuring
This is the step healed photos never show, and it is arguably the most important one. Before any pigment touches the skin, your artist measures your face using classic proportion guides (often called golden-ratio mapping) to find three points on each brow: where it should begin, where the arch should peak, and where the tail should end. The alignment of your nose, eyes, and cheekbones sets all three.
Those points get marked directly on the skin, usually with a fine pencil and sometimes calipers or string for precision, then connected into a full outline. The artist checks that outline straight on, from an angle, and from above, because symmetry that looks right in one view does not always hold up from every angle a photo will actually show. Both brows have to read symmetrical, and you have to approve the shape. Only then does any pigment work begin.
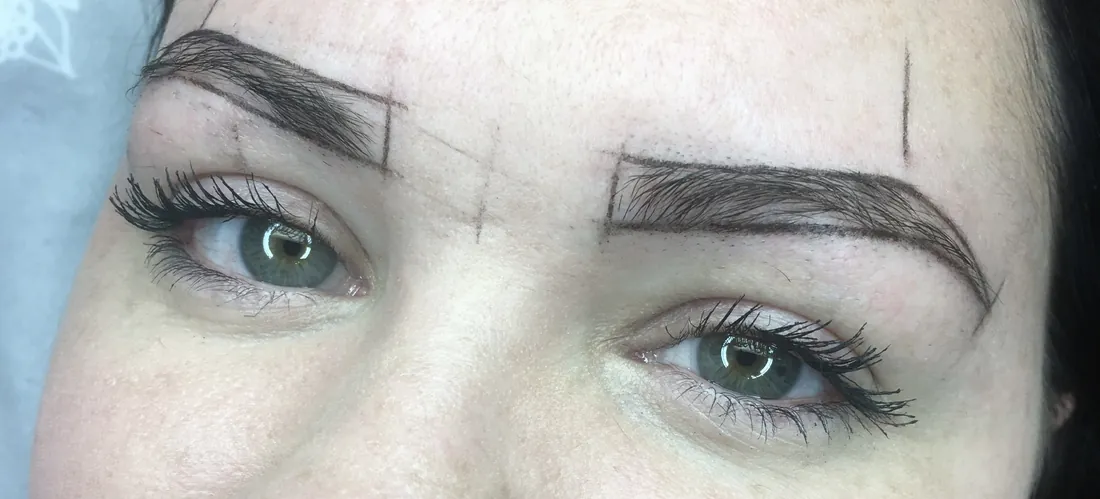
The pencil that maps the shape does more for the final result than the blade that fills it in.
Step Three: Numbing
Once the shape is approved, a topical numbing cream goes on the mapped area and is given time to take effect before any work begins. Most clients describe the sensation during microblading as a light scratching rather than pain, and numbing is typically reapplied partway through the appointment as it wears off. Sensitivity varies from person to person. The step itself is standard across virtually every reputable studio.
Step Four: Hand-Tool Hair Strokes
Microblading gets its name from the tool: a handheld blade made of very fine needles. It makes individual, hair-like incisions in the direction your natural brow hair grows, depositing pigment into each one. Working by hand rather than by machine is what gives microblading its signature texture. Each stroke is placed individually along the mapped outline from step two, varying in length and direction the way real brow hair does.
This is the slowest, most detail-driven part of the appointment. Strokes are built up gradually, brow by brow, with the artist stepping back periodically to check that both sides are developing evenly.
Step Five: The Pigment Mask
Once the hair strokes are placed, a layer of pigment is often applied over the entire mapped area and left to sit briefly. It is sometimes called a mask, sometimes a color boost. The layer evens out tone across the brow, helps the pigment settle a little more deeply, and softens any spot where strokes look too crisp or too sparse before the appointment is complete. Then the mask comes off, and the immediate result is fully visible.
Immediately After Your Appointment
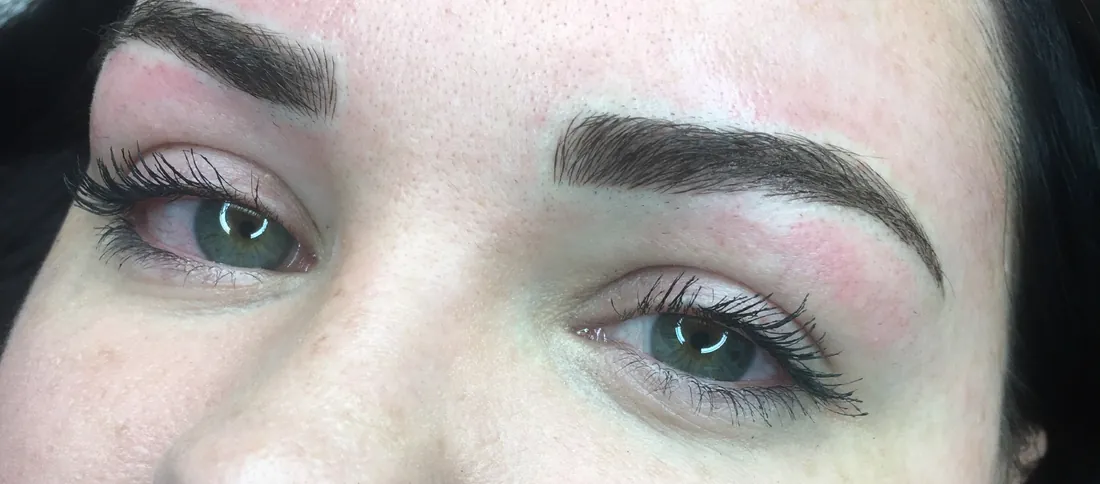
Fresh out of the chair, microbladed brows look considerably bolder and darker than the healed result will be. That is completely normal and expected. Mild redness or slight swelling right around the brow is typical immediately after, and both generally settle within the first day or two.
The Healing Timeline, Day by Day
Healing follows a fairly predictable arc, though every person's skin moves through it a little differently:
- Days one to five: Brows typically look dark and bold, sometimes noticeably more so than expected, with mild tenderness common in the first day or two.
- Days five to seven: Light flaking or peeling usually begins, similar to a light scab. It is a normal part of the skin's healing process. Picking or scratching at it can pull pigment out unevenly, which makes this the one stretch of healing that calls for real patience.
- Around week two: Once flaking finishes, brows often look noticeably lighter, patchy, or faded for a stretch — sometimes called the ghosting phase. That is typically temporary, and not a sign anything went wrong.
- By roughly six weeks: Color usually resurfaces and settles into something closer to the true, final result, as the skin finishes healing underneath.
These ranges are general guidance rather than guarantees. Skin type, aftercare, and individual healing all shift the timeline somewhat.
The Perfecting Touch-Up
A first microblading session rarely locks in the final result on its own. A perfecting touch-up, commonly scheduled about six to eight weeks after the original appointment, is a normal and expected part of the process rather than a correction for anything gone wrong. By that point healing is complete, so your artist can see exactly how the pigment retained, refine any strokes that healed lighter than others, and adjust shape or symmetry with far more precision than was possible on day one.
Aftercare Basics
What happens at home in the weeks after your appointment has a real effect on how the pigment heals. A few habits matter more than the rest:
- Keep brows dry for the window your artist specifies, generally avoiding direct water, steam, and heavy sweating for the first several days.
- Apply the aftercare ointment as directed in a thin layer, never a thick one, following your artist's instructions on frequency.
- Let flaking happen on its own. Picking or peeling early can pull pigment out unevenly and affect the healed result.
- Avoid sun exposure on the brow area while it heals, and use sun protection afterward. UV exposure is one of the main things that fades permanent makeup faster over time.
- Skip retinols, exfoliating acids, and harsh skincare directly on the brow area until healing is complete, since these actively break down pigment.
How Long Microblading Results Generally Last
Microblading is considered semi-permanent rather than permanent, and healed results typically last somewhere between one and three years before a color refresh is worth considering. Color rarely disappears all at once. It fades gradually, a little softer each season, influenced by skin type, sun exposure, skincare habits, and how an individual's skin holds pigment. An annual or biannual refresh is the common way clients keep shape and color where they want it, rather than waiting for it to fade out completely.
Brow Mapping, Done Right, in South Jordan
Aloha Beauty Lounge brings two decades of craft to its studio on River Heights Drive in South Jordan, serving guests from Daybreak, Riverton, and Herriman alongside the rest of the Salt Lake Valley. Permanent makeup here starts the same way every time: a real consultation, a mapped shape you approve before any pigment happens, and licensed hands carrying it through to the touch-up. Browse the full range of brow and permanent makeup options on our service menu, or Opening Soon to begin with a consultation.
Frequently Asked Questions
Does microblading hurt?
Most clients describe the sensation as a light scratching rather than pain. A topical numbing cream is applied before any strokes begin and is typically reapplied partway through the appointment to keep things comfortable. Sensitivity varies from person to person, but the process is generally well tolerated.
Why does brow mapping happen before any pigment is applied?
Mapping measures your face using proportion guides to find where each brow should begin, arch, and end, then draws that shape directly on the skin for your approval. Checking it from more than one angle before any pigment is placed is what keeps the final result symmetrical. A pigment stroke cannot be erased the way a pencil line can.
Why do microbladed brows look so different a week or two after the appointment?
Brows typically look their boldest immediately after the appointment, flake lightly around days five to seven as the skin heals, then often look temporarily lighter or patchy around week two, a stretch sometimes called the ghosting phase. It is a normal part of the healing cycle, and color generally resurfaces and settles by around six weeks.
Is the touch-up appointment necessary?
Yes. A perfecting touch-up, commonly scheduled six to eight weeks after the original appointment, is a standard part of the microblading process rather than an optional extra. It lets your artist see exactly how the pigment healed and refine any strokes or areas of symmetry once healing is fully complete.